Contents
In Process Forms
Miscellaneous
Commercial Bindery Procedures
Discarding Hits to Go
In-house Use Survey Barcodes
Spine Labels
In Process Forms
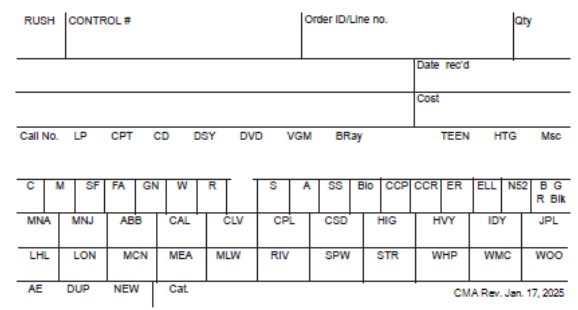
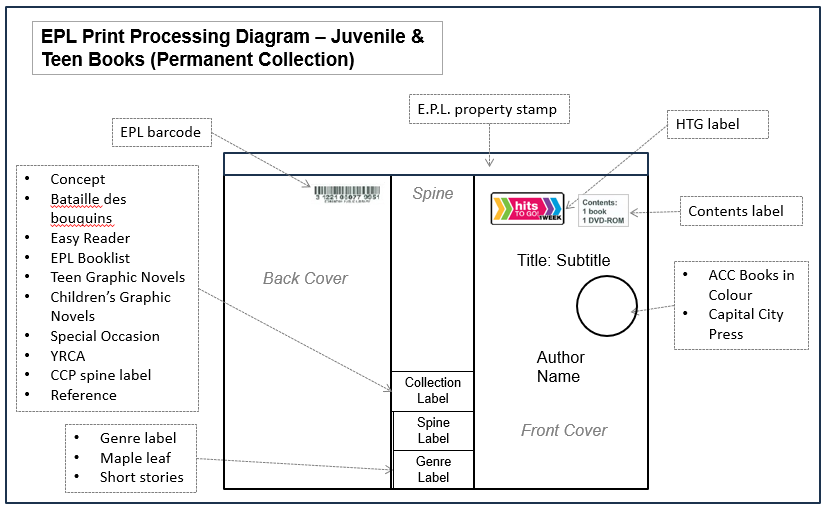
- The symbols below are circled on the In process (IP) form to identify items which require special spine labels.
- They apply to fiction written in English and published in regular print and large print formats.
- The Canadian (maple leaf) label also applies to fiction in English and World Languages. Do not use for Easy English items.
M = Mysteries
W = Westerns
SF = Science Fiction
FA = Fantasy
R = Romance
SP = Sports
A = Animals
C = Canadian
CPT = Concept
SS = Short Stories
GNC = Graphic Novel Collection
- The following symbols on the IP form are circled to identify nonfiction and AV items which require special labels.
PPR = Public Performance Rights
LIT = Literacy/Easy Reading Collection
B = Blue Literacy Label
G = Green Literacy Label
R = Red Literacy Label
B = Black Literacy Label
Miscellaneous
Commercial Bindery Procedures
Outgoing order procedures:
Flushbinds/Checkbind: Usually annual reports. The front and back covers are bare millboard.
- Tie bundles securely with elastic bands around all sides (vertical and horizontal).
- If a sample copy is being sent, tape a slip on the book with ‘SAMPLE’, the colour # and the colour.
- Count total # of flushbinds and record total. Keep this information on file until the order is returned.
- Disable all RFIDs
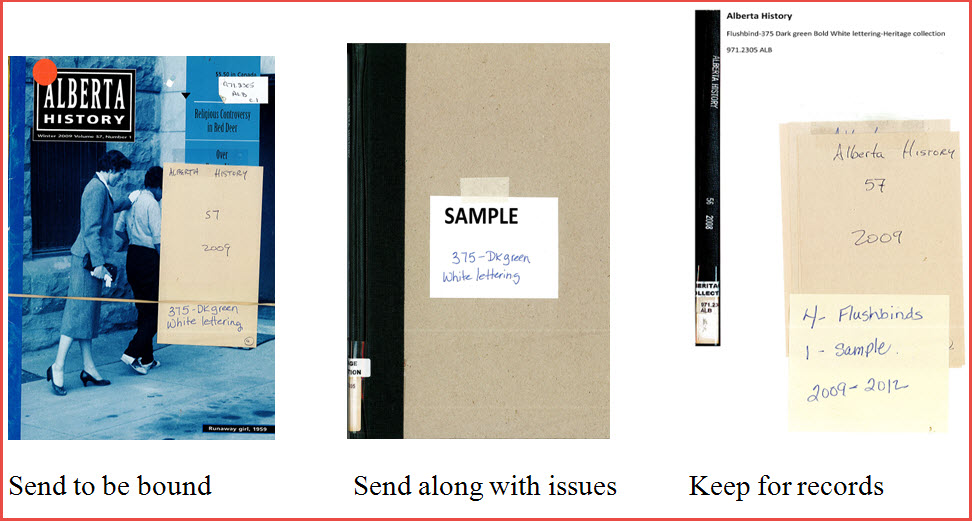
Rebinds: Hardcover books with or without dust jackets. The edges will be ⅛ inch to ¼ inch larger than the pages, to give protection to the book as it sits on the shelf. A rebind is a book that is given a new cover with new foil stamping.
- Service point staff check books for repairs that can be done in the branch, such as loose pages, torn pages, dirty pages. If more extensive repair is required, the item is sent to CMA. CMA staff review items and if the book cannot be repaired in-house, the Collections Librarians examine the items and determine whether rebinding is justified. If justified, the item is sent to EPL’s commercial bindery.
- All books sent to commercial bindery must have enough margin to be re-bound, at least ¼ inch. See also “Item Repair and Maintenance Guidelines” document on StaffWeb for more information.
- Collections librarians will evaluate the material and decide whether to: discard, re-order, or send to commercial bindery.
For items being sent to the commercial bindery:
- Use pencil to underline the title on the title page then mark a T to indicate title.
- Use pencil to underline author’s last name, (if no author then write “no author”). Mark an A underneath the underline.
- If the book has a pocket or bookplate write ‘Please leave on’ to notify the commercial binder that you would like to keep this.
- If there are any booklets attach a sticky note that would say please attach.
- Check the book out on the CMA-ATLASBIND#1 card.
- Remove dust jackets and relaminate if needed.
- Attach a sticky note to front title page with needed info:
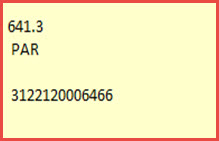
- Old items that need to be rebound (only if approved by CMA Manager)
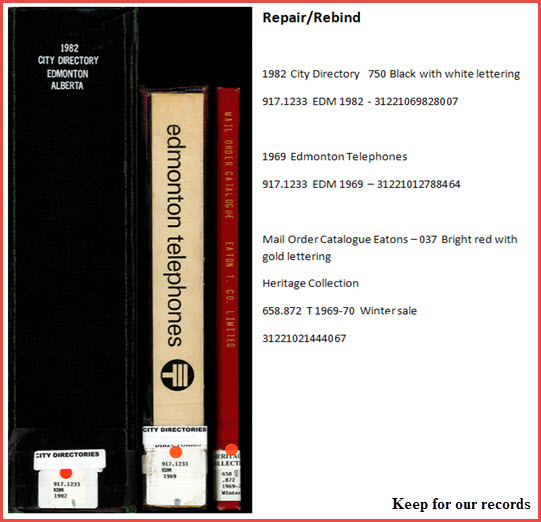
- Make a list of all books checked out to the CMA-ATLASBIND#1 card that will be sent to commercial bindery, e.g.

Durabind (Permabind): Book with a paperback cover that has not received a plastic cover (i.e. Kapco Easy-cover). Includes books with spiral spines, soft cover books. The cover of the original book is cut, glued onto white paper, laminated and affixed to millboard. Title is imprinted on the spine.
- Prepare as a rebind, underlining title and author.
- If spiral bound indicate that the spiral is to be removed.
Library Board Meeting Minutes:
- 037 Bright Red -- one copy for the CEO's office
- 430 Bright Blue -- one copy for the North of 52 Collection
- REF Bind
- Gold uppercase lettering
Reference: Books such as atlases, dictionaries, or encyclopedias. A rebind-style cover will be supplied. If the item has been sent to the bindery in the past, it will be listed in the binder. Write the colour on an attached slip.
Before Sending Out:
- Make sure there is a record of all items sent. (Duplicate slips for the flushbinds and a printout of the items checked out to the commercial bindery card -- CMA-ATLASBIND#1.)
- Shadow item records for any last copies in the ILS.
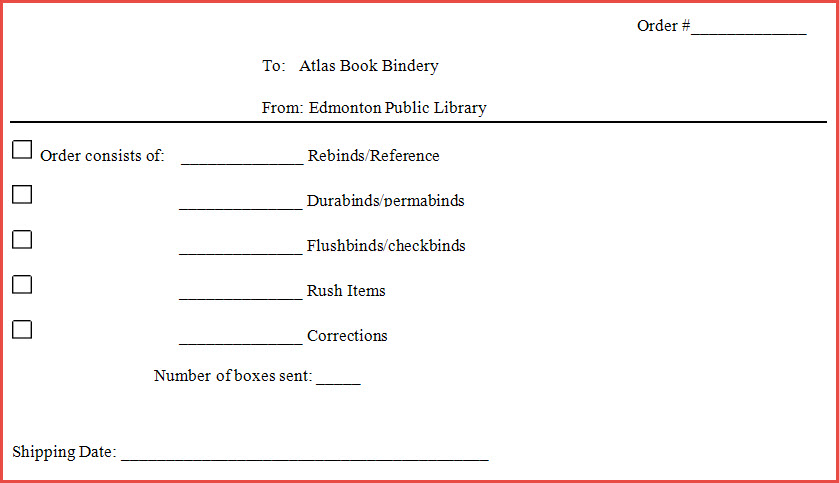
- Fill out the order slip for the binder stating the number of items that are being sent, the number of samples included, the number of corrections, and the number of boxes. Print slips as required using the Word document at file:///S:\cat\Commercial%20Bindery\Commercial%20Bindery_2011\Order%20Slip.docx. Sample:
- Pack material into boxes; keep the weight manageable.
- Affix address label stickers to each box. The stickers are printed with the address of the commercial bindery (currently Atlas Book Bindery).
- Contact the Shipper/Receiver (Loading dock). They will pick up the boxes and contact PDQ courier for pickup.
- Record the number of items on the monthly statistics sheet under Com. Bindery.
Commercial bindery return:
Flushbinds:
- Match the flushbind slips to slips inside each book. Check that spine information and color are correct. Remove slip from book and discard.
- Check binding by opening book and ensure it will lie flat. Check that issues are in correct order and look for loose pages.
- Print spine label for each one.
- Count flushbinds and any samples sent and compare to CMA records.
- Attach RFID tag to inside back cover of each volume.
- Corrections: For items returned from the commercial bindery with faults, such as: wrong information on spine; item bound upside down; stitching too close to the print; no margin, etc. attach a slip of white paper to the item and record the problem and the original order #.
Rebinds:
- Check binding and that pages are not upside down.
- Check that spine information is correct.
- Affix RFID tag to inside back cover
- Print spine label, and if needed, affix barcode and enter.
- Dust jacket can be placed on the book again.
- Count all books and compare to CMA records.
Erase any underlining that was done in pencil.
- Discharge all items from the CMA-ATLASBIND#1 card.
- Unshadow item records for any last copies in the ILS.
Discarding Hits to Go
- Discard items by checking them out to the DISCARD-BTGFTG card using the Checkout wizard in Symphony; override and checkout if any pop-ups appear.
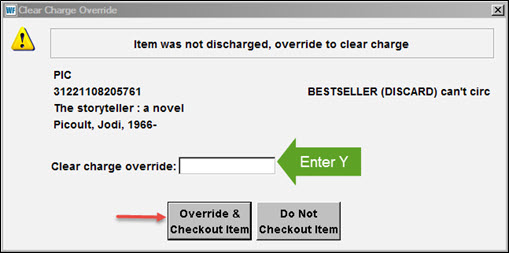
- To override enter “Y” and click “Override & Checkout Item”.
- Disable the RFID tag using the 3M Pad Conversion software.
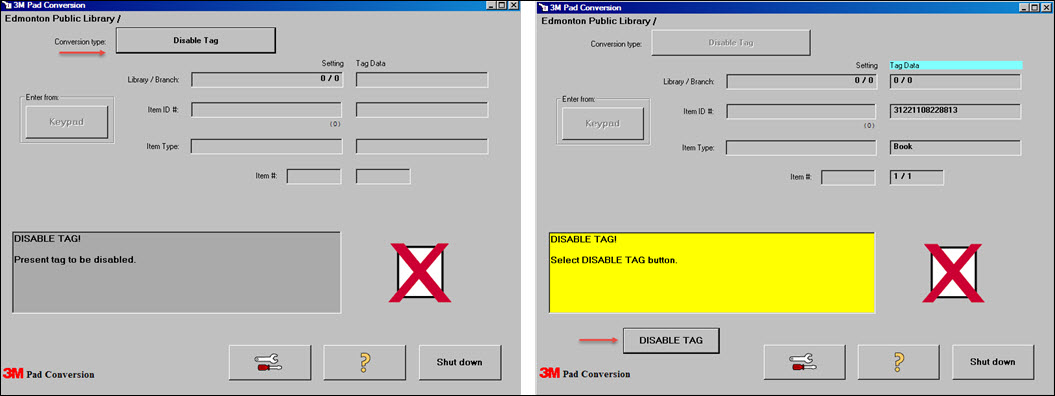
- Select Disable Tag for conversion type, place item on pad and click disable tag.
- Black out the barcode using a permanent marker and remove any routing/system hold slips from items.
Disposal
- Items in decent condition may be placed in Better World boxes, labelled and sent to Booksale, unless a specific title (books only) is requested for the Edmonton Institute For Women book clubs.
- Damaged books may be recycled in the large blue bins.
- Damaged AV cases are recycled; discs are disposed of.
In-house Use Survey Barcodes
- A survey of in-house use of library materials is conducted semi-annually.
- Service point staff collect items from tables, etc. at specified intervals and use of items is counted by scanning a "dummy" barcode for the type of material, if it isn't catalogued with a unique barcode.
- Barcodes for this purpose are prepared by CMA Item Entry Processors.
- Each service point's three-letter code, the type of material the barcode represents, and a barcode label are affixed to card stock or an 8.5" x 11" piece of paper. The template is available on CMA's One Drive under General > Processing > In house use survey
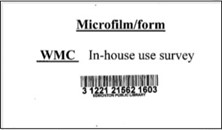
- Additional cards with barcodes are supplied on request. The barcodes are attached to a shadowed record for each category.
- Microfilm/form -- TCN a573387
- Newspaper -- TCN a573388
- Microfilm/form -- TCN a573387
- If a previously used barcode comes up as Not-on-file, it may be reattached to the correct shadowed record for that category upon request.
Spine Labels
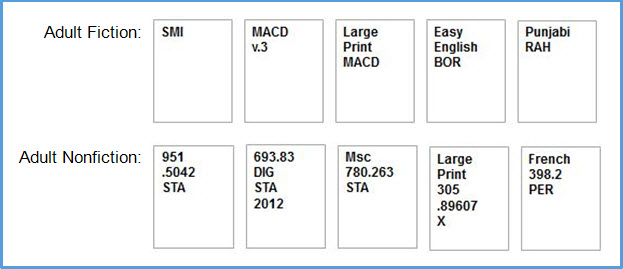
- Approx. 1" x 1.25" with call number aligned to left margin; see samples below
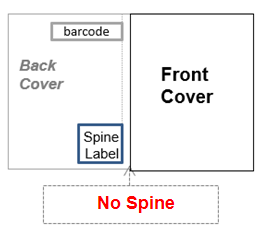
- Affix on spine near bottom edge with at least the first 2 characters clearly visible on the spine. Placement on the actual spine is always preferred.
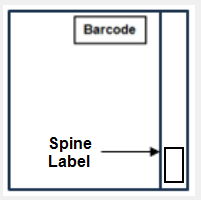
For books with no spine, affix the spine label on the back cover in the lower right corner.
- Label font is 11 pt Arial Bold in black; max. number of lines is seven
- Use Arabic numerals for roman volume numbers on spine labels
- Spine label samples:
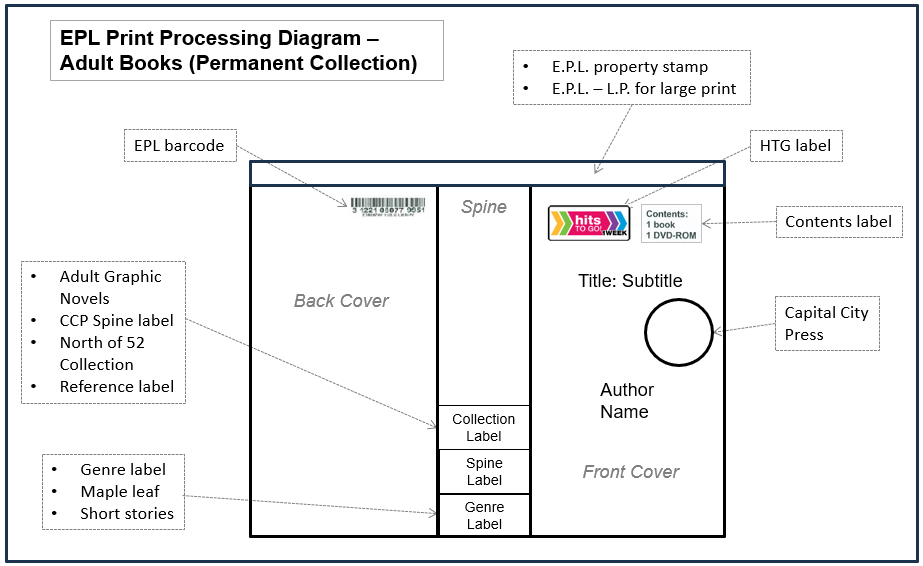
- Print label placement examples:
Last revised: Feb. 10, 2026